Angel Biscuits
I recently started following a great blog called The Kitchn. They post more frequently than Ree, but it’s not a personal/narrative-type blog, so it’s really easy to sift through the feed and pick out the things that are of interest to you. The posts range from cooking tips and kitchen remodels to recipes and tools (I actually never thought I’d buy a citrus reamer, but I saw this post and finally have one pretty enough to be worth owning). Most of the blogs that I follow are wordy and wonderful, but they require a time commitment to keep up with. The Kitchn, on the other hand, offers a nice, casual read when my mind needs a little break during the day.
A couple weeks ago, The Kitchn posted this recipe for Buttery Lemon Angel Biscuits, an adaptation of a recipe they featured over a year ago for regular Angel Biscuits. While lemon and butter are certainly a heavenly combo, the flavorings weren’t the thing that caught my eye—it was the fact that the biscuits employ three (yes, three!) different leaveners to achieve their lift.
I’ve had some success with gluten-free biscuits in the past, but I also know it’s a pretty common thing to have a great deal of difficulty getting them to emerge from the oven with a proper rise. Heck, even people baking with gluten can have a tough time producing light, lifted biscuits. But with three separate leaveners on your side? It seemed impossible to fail.
And after making them? I firmly believe that you’d really have to try to mess these up.
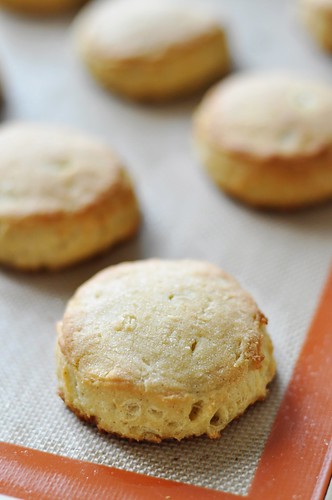
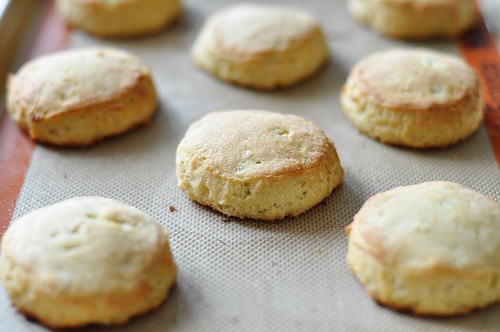
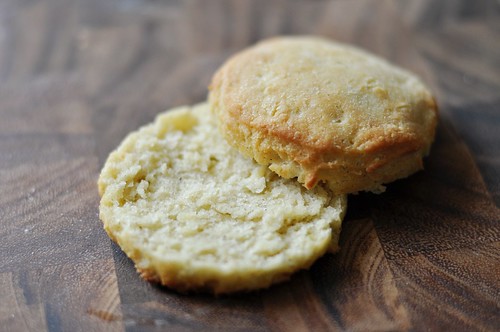
The end result falls somewhere between a classic biscuit and a dinner roll, leaning just a smidge closer to the latter. They’re golden on the outside and soft and chewy on the inside. You can serve them with dinner or cut them in half for breakfast sandwiches—and I bet they’d make tasty little slider buns as well.
If it isn’t already obvious, I’m totally in love.
If you’re looking at the yield, though, and thinking, “Holy crap, no wonder your jeans are running a bit tight these days,” you’d be wrong. These are only partially to blame. Yes the recipe makes a lot, but if you’re not making them for a dinner party or holiday gathering (read: feeding a crowd), you can bake as many as you want and freeze the remaining cut, unbaked biscuits. Then you just pull them out and bake them as you need. I’ve done it a few times now, straight out the freezer, and they come out perfect every time.
I’m still working on a classic, flaky buttermilk biscuit, but these babies are my new go-to, all-purpose roll. It’s a good thing too—after a couple of test batches our freezer is positively stocked.
Angel Biscuits
Adapted from Please Pass the Pie
Makes 18-20 biscuits
1 2/3 cups / 7.05 oz millet flour
1 1/3 cups / 8.4 oz potato starch, plus more for dusting
1 cup / 4.5 oz sorghum flour
2/3 cup / 2.85 oz tapioca flour
2 teaspoons xanthan gum
1 teaspoon baking powder
1 teaspoon baking soda
1/4 cup / 1.75 oz sugar
1 teaspoon salt
1/2 cup / 4 oz warm water
1 packet active dry yeast, 1/4 oz or 2 1/4 teaspoons
1/2 cup / 4 oz cold, unsalted butter, cut into cubes
2 cups / 17 oz buttermilk
Additional melted butter (1 tablespoon for every 4 biscuits), for brushing
In a large bowl, whisk together the millet flour, potato starch, sorghum and tapioca flours, the xanthan gum, baking powder, baking soda, sugar, and salt.
Pour the warm water into a small bowl and stir in the yeast. Set aside.
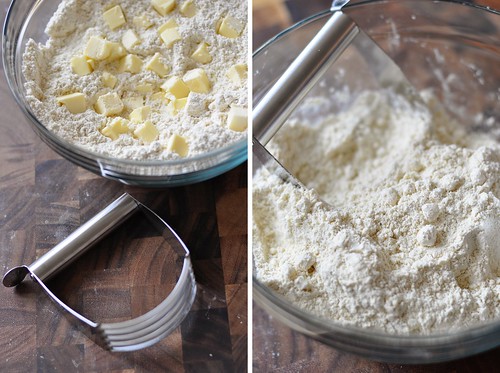
Using a pastry cutter or a pair of knives, cut the butter into the flour mixture until there are no pieces any larger than a pea. Pour in the yeast mixture and the buttermilk and stir just until all the flour is incorporated. Cover with plastic wrap and refrigerate for one hour.
Preheat the oven to 450 degrees.
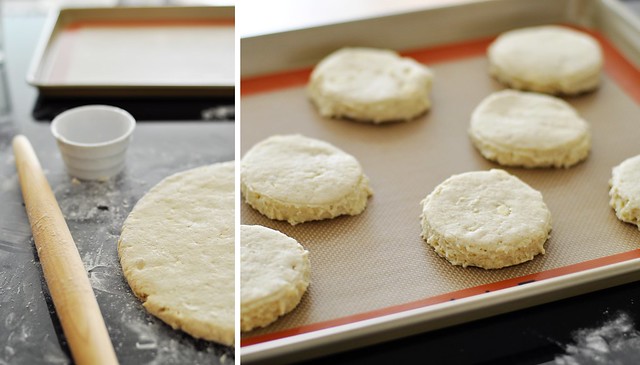
Turn the chilled dough out onto a work surface dusted well with potato starch. The dough will be very moist and sticky. Knead a couple times with your hands, working it into a disc and using the potato starch to keep it from sticking to your fingers or work surface as needed. Once the dough is together, roll it out to a 1/2-inch thickness.
Using 3″ biscuit cutters (or a guide and a knife), cut out individual biscuits. Gather the scraps of dough together and re-roll. Cut additional biscuits and repeat until all the dough has been used.
Transfer cut biscuits to a baking sheet that has either been lined with a silpat or sprayed with cooking spray. Brush with melted butter and place in the oven. Bake for 10-15 minutes, until the tops are golden brown.
To freeze: Place cut biscuits on a sheet pan, cover with plastic wrap, and freeze until solid. Transfer the frozen biscuits to freezer-safe food storage bags and keep in the freezer. Bake off as needed by placing the frozen biscuits on a baking sheet, brushing with butter if desired, and baking at 450 degrees for 15-20 minutes.


7 comments:
Is there any way to print your recipes without having to print the whole post? I'd like to try some of them but that is a lot of printing! My husband has been wanting biscuits ever since I was diagnosed with CD. This looks like it would do it.
Babara – I am working on this! It'll be a couple more weeks, but it is coming. I apologize, I know it's long overdue.
So glad to hear that! And thanks for the fast answer!
I can't wait to try these – they look fabulous!! It's been so long since I've had a good biscuit
Those are melt in your mouth perfect! Love this!
New to your blog; happy I found you!
Mary xo
Delightful Bitefuls
Can you recommend a good alternative to the buttermmilk? Do you think almond milk or something a long those lines will still work?
Jessica, you can make faux buttermilk by mixing either 1 tablespoon of white vinegar or lemon juice with 1 cup of milk and letting it stand for a few minutes. I have heard of people doing this with non-dairy milks as well. You’ll want to make sure to choose one of the thicker, creamier non-dairy milks, though, since buttermilk is quite thick (I’ve found that some almond milk can be very watery).