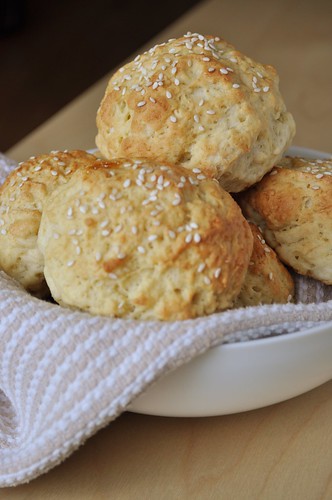
Brioche Burger Buns
When I first went gluten-free, I was all too happy to renounce bread in all its forms. I felt so amazing that it never fazed me to pass up the bread basket, say no to those croutons, or order my burger on a bed of lettuce instead of a bun. As time went on, however, the bunless burger became less and less appealing. The initial joy of warm, well-seasoned beef contrasting with crisp, cool lettuce slowly turned to thoughts of a greasy mass weighting down a pile of wilting leaves. It almost made me not want the burger altogether.
So we started eating our burgers on a bed of quinoa. This was a tasty, protein-packed combo. The quinoa provided that sort of carby complement to the hamburger, something to offset the beefiness and absorb the juices. This was particularly good when I had made some sort of sauce or condiment to slather on top (feta-stuffed turkey burgers with homemade tzatziki was a favorite) as it could drip down and mix with the quinoa.
But even these burgers still required a fork and knife.
There’s something almost fundamental about the burger/bun combo. The bun not only helps to absorb the flavorful burger runoff, but it is essential to making the burger into casual, handheld fare. I’m all for fork and knife burgers, but when you’re at a party or a barbeque, eating off of paper plates, standing or, at best, using your lap as a table, a burger on any sort of “bed” becomes a real challenge. And I’m sure we’ve all had our fair share of experiences with those store-bought buns—you know, the kind that look awfully pretty in the freezer case but fall to dry crumbles the second you take a bite?
Well, my gluten-free friends, prepare to go bunless no more!
I recently ran across these gorgeous brioche burger buns from Deb at Smitten Kitchen. I’ve bookmarked dozens of recipes from her site that I intend to adapt to gluten-free, but these called out to me with urgency the second I saw them. Not to mention, Chris has been on a bit of a burger kick lately, so the timing was right on.
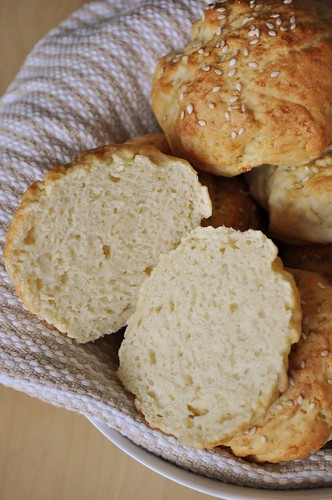
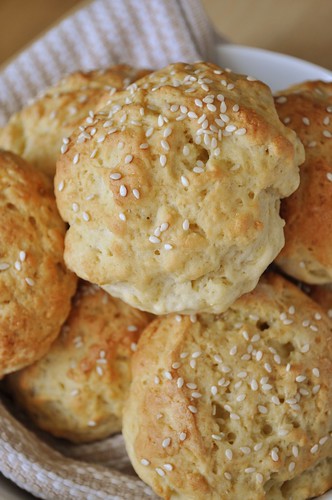
And okay, they may not be the smooth, shiny buns that emerged from Deb’s kitchen, but this gluten-free version has a charm and inner beauty of its own. These buns are buttery, slightly sweet, and so achingly soft—with just the right amount of bounce and stretch—that it’s hard not to sigh when you cut into them. They’re wonderful warm from the oven with a smear of butter, perfect with a burger stuffed in their halves, and even make for fantastic breakfast sandwiches the next morning.
To make things even better, this recipe is really nothing fancy. It’s a fairly basic yeasted dough. There are a lot of words in those instructions below, but I promise it’s this easy: Mix it up, let it rise, divide it out, roll it into balls, let it rise once more, and bake it. Most of the time put into this recipe is effortless on the part of the baker—just sit back and let the yeast do its work.
Brioche Buns
Adapted from Smitten Kitchen
Makes 8 buns
1 cup brown rice flour
1 cup millet flour
2/3 cup sweet rice flour
2/3 cup tapioca flour
2 ½ teaspoons xanthan gum
1 1/2 teaspoons salt
1 ¼ oz. packet dry active yeast (2 ¼ teaspoons)
1 cup warm water
3 tablespoons milk
2 ½ tablespoons sugar
2 large eggs
2 ½ tablespoons unsalted butter, softened
Sesame seeds (optional)
In a small bowl, whisk together the yeast, water, milk, and sugar. Set aside for about 5 minutes, or until foamy. In a separate bowl, lightly beat one of the eggs.
In a large bowl, whisk together the brown rice, millet, sweet rice, and tapioca flours, the xanthan gum, and the salt. Work the softened butter in with your fingers until there are no large pieces left. Add the beaten egg and the yeast mixture to the flour, mixing with a spatula to combine.
Turn the dough out onto a floured countertop or work surface (I like to use potato starch for this, but feel free to use any of the above listed flours). Knead the dough for a few minutes by repeatedly slapping it onto the counter and turning it. The dough should be soft, only slightly sticky, and well-combined. Form the dough into a ball and place it back in the bowl. Spray lightly with cooking spray to keep the dough moist, cover with plastic wrap and allow to rise until doubled, 1-2 hours*.
Using a spatula to cut across the dough ball, divide it into 8 equal pieces. Wet or lightly grease your hands (this will keep the dough from sticking) and gently form each piece into a ball. Place the rolls 2” apart on a parchment-lined baking sheet. Cover lightly with a piece of plastic wrap that has been sprayed with cooking spray and let rise for another hour.
Preheat the oven to 400 degrees. Place a cast iron skillet or baking pan filled with an inch of water on the bottom rack of the oven.
Remove the plastic wrap from the rolls. Whisk the remaining egg with a splash of water and brush the rolls generously with the egg wash. Sprinkle on the sesame seeds, if using. Place the rolls in the oven and bake for about 20 minutes, until the tops are golden.
The buns will keep on the counter in a sealed plastic food storage bag for 3 days. Store them in the fridge for up to a week, or in the freezer for up to 3 months.
*Theoretically, the dough is supposed to rise for this much time, but my dough ball had doubled in just under an hour. My kitchen may just be warm, but make sure to check yours at around an hour, just in case. If you let it rise for too long, it will overinflate, becoming loose and flabby and falling in on itself. If this happens you may need a longer second rise.


4 comments:
I wish I could adequately describe to you just how fantastic this meal was. Fantastic food made the night all that much more enjoyable. A glowing endorsement on my end!
Awww, thanks Dave! I'm so glad you were able to stop by for the evening–Chris & I both loved seeing/spending time you! Thanks again for the GF beer.
These look amazing!! Do you think they would work with egg replacer instead of an egg?
Sondi, I imagine it would since the leavening is all in the yeast and both the xanthan gum and tapioca starch are doing a lot of binding work. The egg wash on the outside adds a lot, but you may be able to brush on some butter or milk to get a similar effect.